环境要求:python3、PHP、Mysql。
下文在CentOS 7下成功。
1、创建PHP、Mysql环境,并安装WordPress和chevereto图床
具体安装WordPress图文教程:使用VPS安装Nginx、PHP、Mysql,创建wordpress博客
同时,可安装chevereto图床程序,安装完成后,先去chevereto后台关闭防洪保护,然后再去上传参数那边根据自己的要求设置。
2、安装Python3.6和pip3
其中,c、d、e步骤 可以省略。
a、更新源
yum install epel-release
yum install https://centos7.iuscommunity.org/ius-release.rpm
b、安装Python3.6
yum install python36u
c、创建python3连接符
ln -s /bin/python3.6 /bin/python3
d、安装pip3
yum install python36u-pip
e、创建pip3链接符
ln -s /bin/pip3.6 /bin/pip3
f、安装requests和pymysql
pip3 install requests
pip3 install pymysql
3、爬虫代码下载及修改
a、创建存放目录
mkdir /home/1024
b、进入目录
cd /home/1024
c、下载爬虫
wget https://zhujiwiki.com/wp-content/uploads/2018/03/1024_img_spider_wordpress.py
d、编辑1024_img_spider_wordpress.py文件
vi spider.py
配置参数
d-1、在12行这里填写WordPress的MySQL数据库参数
conn = pymysql.connect(host=”, port=3306, user=’MySQL用户名’, passwd=’密码’, db=’MySQL数据库名’, charset=’utf8′) #数据库填这里
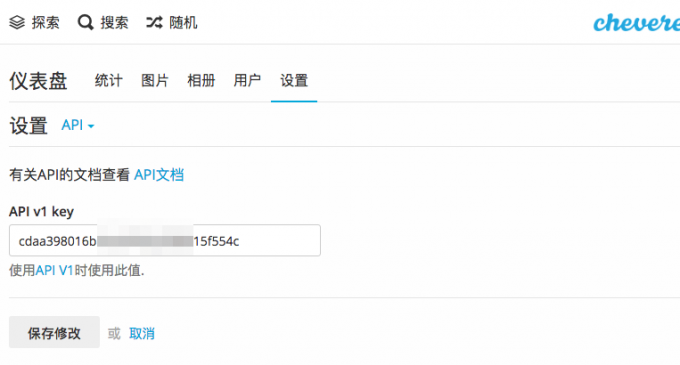
d-2、在26行这里添加图床的API
APIKey = “” #API填这里
这个API可以在chevereto后台找到
在28行这里修改你的图床地址
url = “http://你的域名/api/1/upload/?key=”+ APIKey + “&format=” + format #图床地址
d-3、退出保存1024_img_spider_wordpress.py文件。
e、修改文件权限
chmod +x spider.py
4、运行,并查看效果
a、运行
python3 spider.py
b、打开网站查看效果
5、CentOS/Debian下安装Python3和pip3
a、检查下系统是否有Python3
python3 -V
b、安装Python3
CentOS系统
wget https://zhujiwiki.com/wp-content/uploads/2018/03/CentOS_Python3.6.sh && sh CentOS_Python3.6.sh
Debian系统
wget https://zhujiwiki.com/wp-content/uploads/2018/03/Debian_Python3.6.sh && sh Debian_Python3.6.sh
然后再输入python3 -V看是否安装成功。一般安装成功就可以使用python3、pip3了。
via:https://github.com/ishkong/1024_img_spider_wordpress、https://www.openos.org/post/165/、https://www.moerats.com/archives/507/
-
所有主机信息仅是为及时分享并收录,不做推荐!


